


I take it you’ve landed on this page because you’re wondering how hard it is to start fletching your own arrows. Or perhaps, you’re wondering how much time and money you can save by doing it yourself. As of last week, I was in the same boat.
Sick of only having three usable arrows in my quiver following several weeks of archery league, I set out on an Amazon shopping mission where I would finally buy a fletching jig, some blu-glu, blazer vanes, and arrow shafts, so I could finally fletch my own arrows from here on out. So long to the pesky pro-shop visits, half full quivers, and vaneless arrows!
Once you have an arrow fletching jig, fletching glue, and baggy of extra arrow vanes, you’re pretty much set for a number of years. Now onto the process itself…
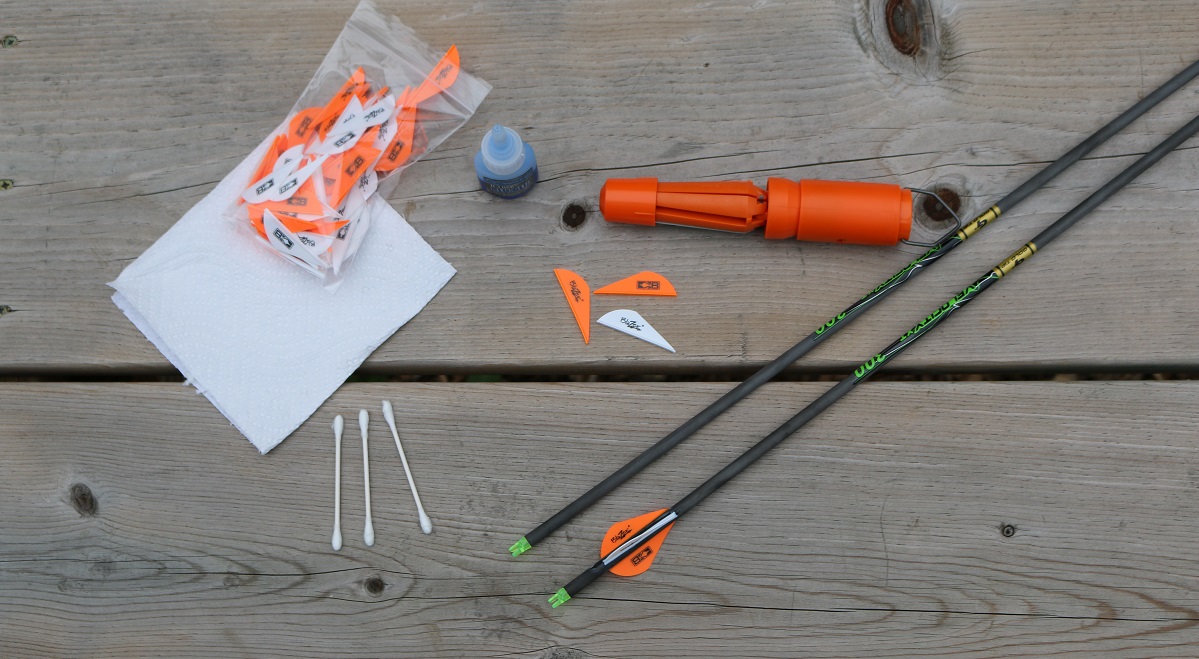
What You’ll Need
- Arrow Shafts
- Arrow Vanes
- Fletching Jig
- Insert/Fletching Glue (Fast Drying)
- Paper Towel
- Denatured Alcohol
The following steps correlate with the use of the Easton EZ Fletch Jig or the Arizona EZ Fletch Jig. Other fletching jigs may require additional/different installation techniques. I’ll discuss the pros and cons a bit later.
Step 1: Clean Arrow Shaft

Clean the nock end of your arrow with a paper towel soaked with denatured alcohol. Let dry.
Step 2: Place Fletchings into Jig

Load your 3 vanes into the appropriate slots of the fletching jig. Notice how the arms of the jig have two of the same color and one that’s different, just like a standard fletched arrow.
Step 3: Apply Fletching Glue to Vanes

Apply an even and thin layer of fletching glue to the arrow vane.
Step 4: Put Arrow in Jig

Load the arrow until the nock is seated in jig and release the spring-loaded jig arms by pulling back on the collar and twisting ¼ turn.
Step 5: Close/Lock Fletching Jig

Slide the top collar over and down the arrow shaft, align groves, and press firmly into place. Let dry for 10 seconds (depending on type of glue you use).
Step 6: Remove Fletched Arrow

Remove sliding collar and release the spring loaded lower collar. Remove arrow.
Step 7: Clean Off Excess Glue

Wipe off any excess glue between the arrow fletchings. Also, remove any glue that may have oozed out onto the fletching jig.
Step 8: Tip & Tail Vanes

Apply a small dot of glue to the front and tail end of each fletching to improve fletching durability.
As you can see, fletching your own arrows is a pretty simple process that takes roughly one minute per arrow. After fletching a dozen new arrows, I wish I would have bought a fletching jig years ago. The pros far outweigh the cons, and the costs of the fletching jig and glue paid for themselves with the savings received from buying a dozen arrow shafts and 100-pack of vanes separately.
Pros & Cons
Pros
- Customized vane colors
- No more trips to archery pro-shop for refletched arrows
- Fast and easy
- Saves you money
- DIY Costs – $163 Total
- 12 arrow shafts ($85)
- 100 Blazer Vanes ($13)
- G-5 Blu Glu ($15)
- Easton EZ Fletch ($50)
- Same Arrow Setup Ready-to-Go from Gold Tip – $160 Total
- DIY Costs – $163 Total
Cons
- Can’t find any…oh, maybe the fact you have to do it yourself.
For a hunter, the Easton EZ Fletch is super easy to use and pack along in your bow case. Other models like the Bohning or Bitzenburger are a little more high-end and with that, offer a bit more customization. Regardless of the jig you choose, you’ll end up saving a lot of time and money in the end by fletching your own arrows.

