


Early season whitetails can provide some outstanding hunting opportunities, especially if you have a solid plan of attack. When I’m planning my early season hunting, I like to think of it as a process and have steps in place to put down a buck. There are three main steps I take when it comes to executing an early season plan and if I can accomplish them all, I know my odds of sending an arrow through a buck during the early season will be fairly high.
Step 1: Locate a Buck
It may seem obvious, but where early season hunting can differ from the rest of the year is that bucks are usually sticking to a tight pattern. Unlike the rut, where you can go in blind, set up in a great rut spot, and have a shot at potentially putting down a buck, the first step to harvesting an early season buck is by locating one to go after. Depending on your hunting situation, there are two main ways that I’ve found to do this:
1-Trail Cameras
If you can locate a buck with trail cameras during the summer or first couple weeks of September, you can then make a plan on how to hunt that buck (we’ll get into this in the next step). The important thing when it comes to trail camera photos is to understand what’s important and what isn’t. What I’m getting at here is that when you locate a buck via trail camera, there is a difference between getting photos of a buck that shows up in daylight and those with bucks that only show up every three weeks at 2:00 am. Just because you get trail camera pictures of a buck randomly doesn’t mean he’s killable.
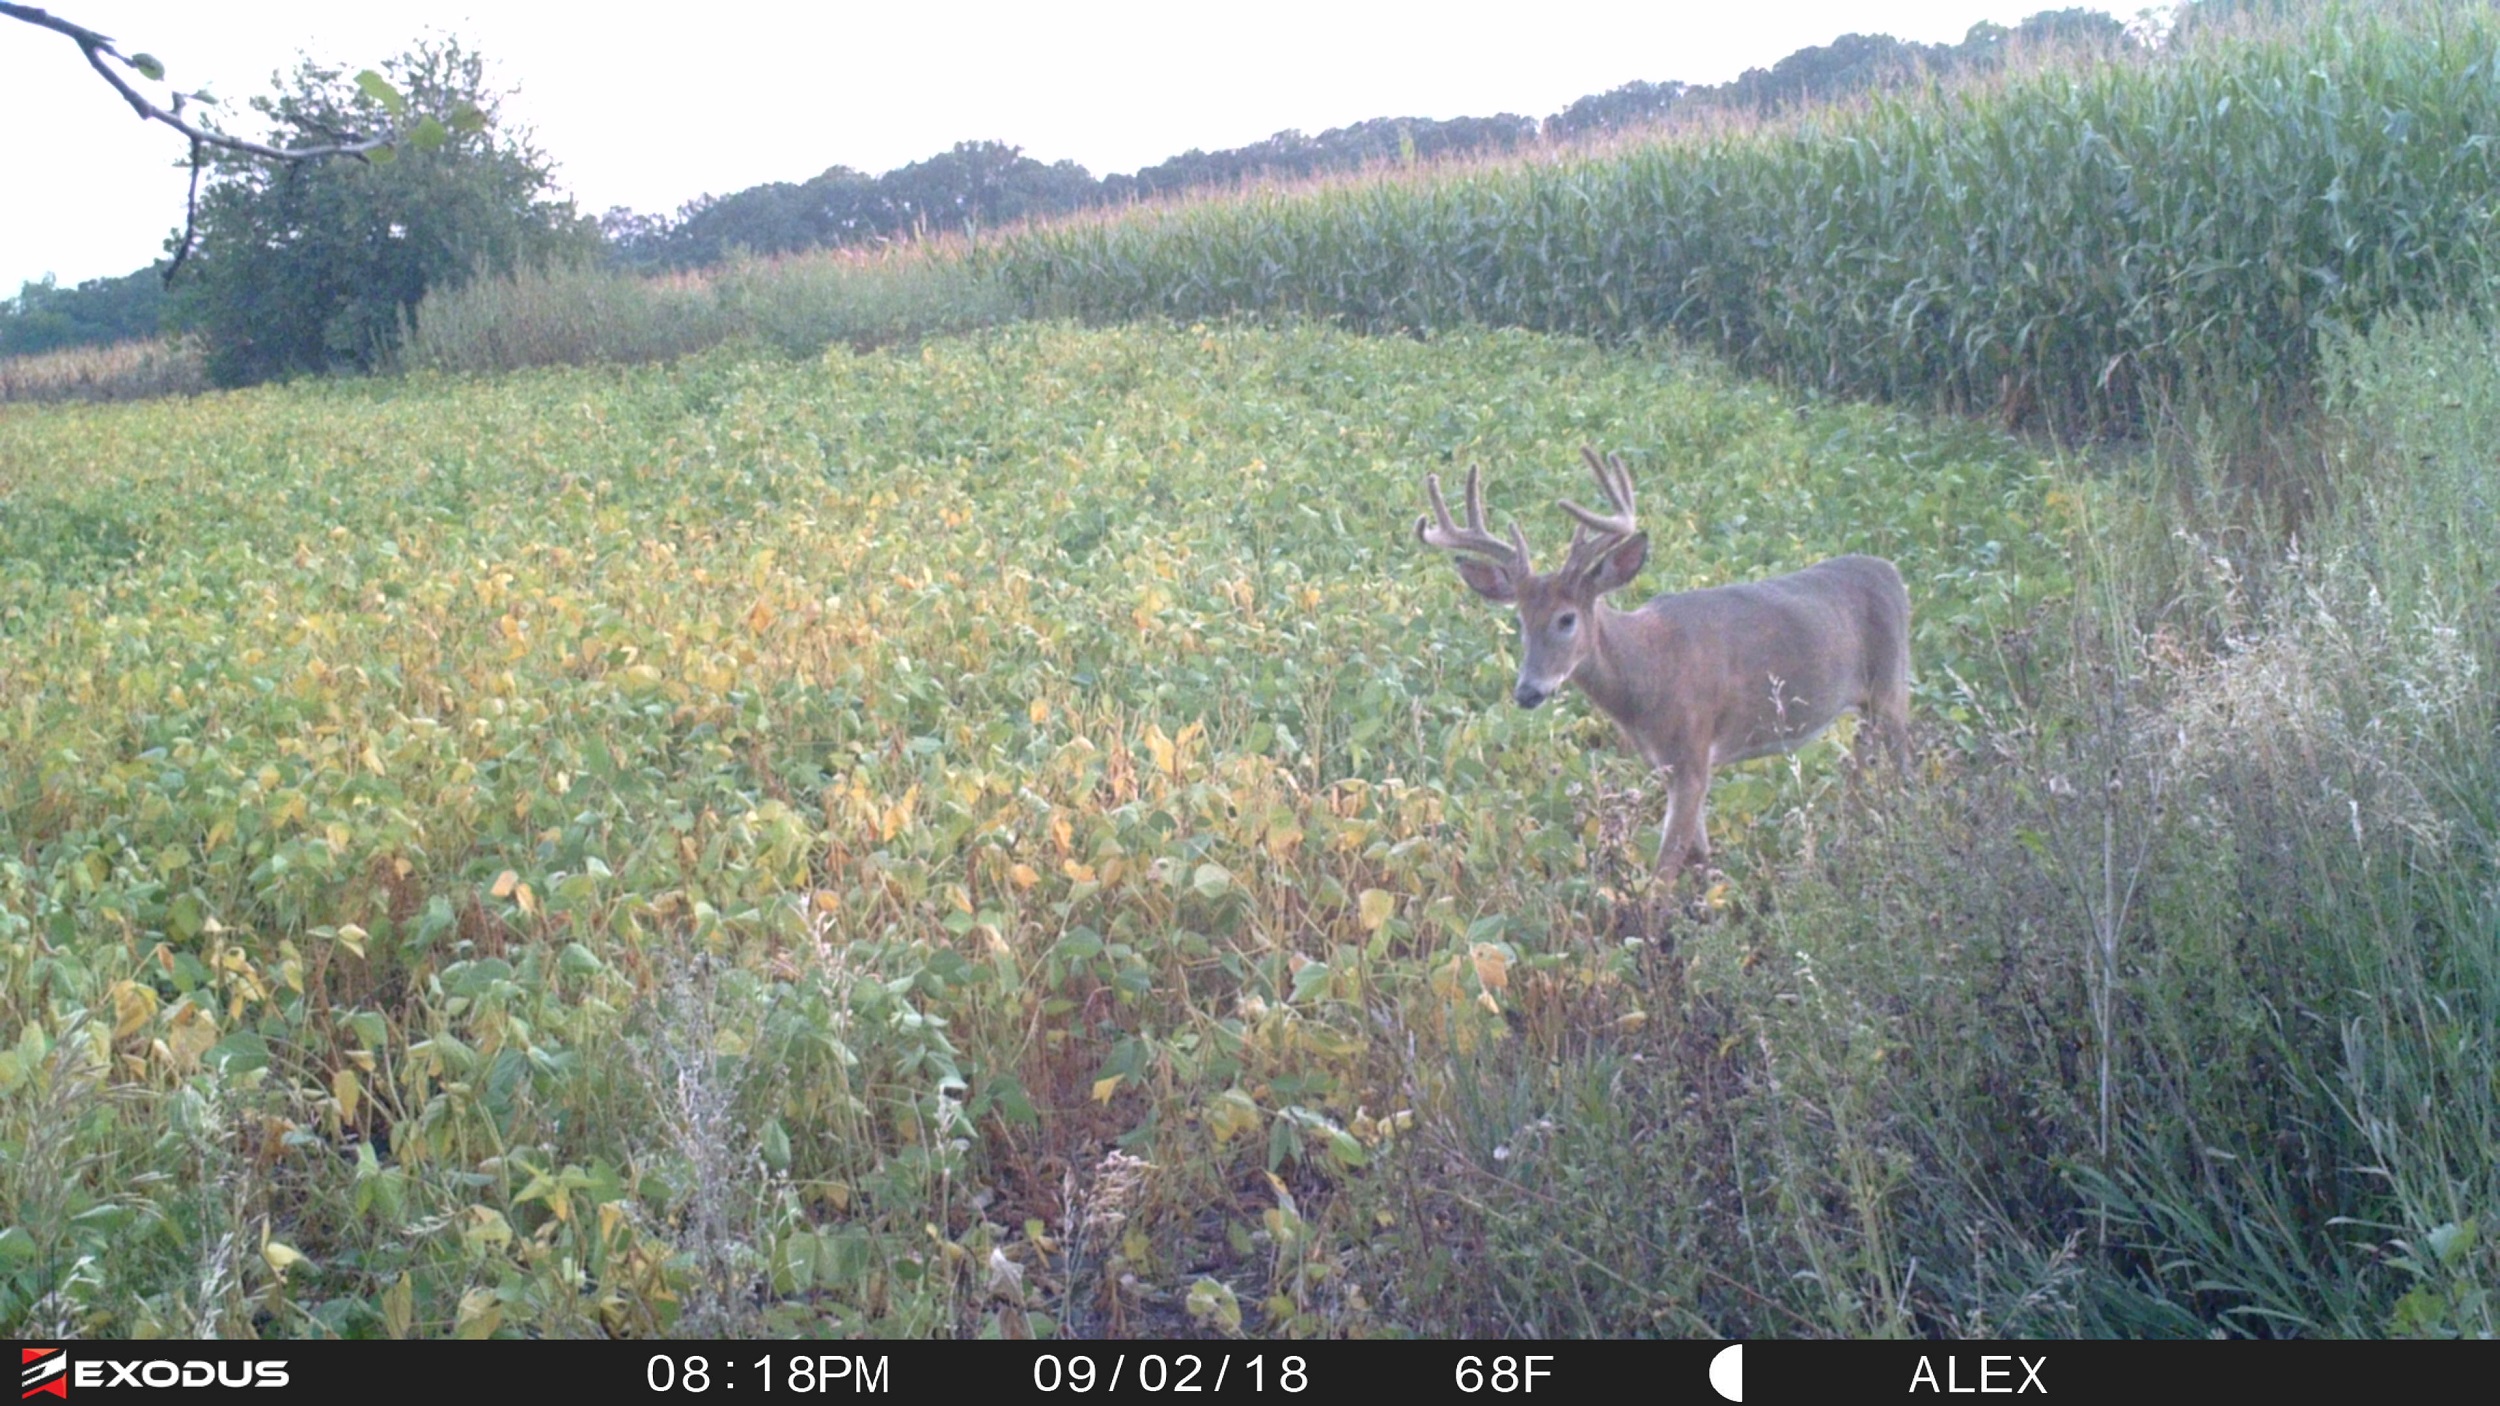 The author used the intel from this photo to make a move on a daylight mover. You’ll see below that it paid off big!
2-Observation
The other great way to locate a buck in the early onsets of the season is through observation. Observation sits are imperative when you’re hunting out of state or don’t have the time to run trail cameras. When you are out hunting, it doesn’t matter if you’re trying to get in and hunt a bedding area like The Hunting Public often does (click here to watch the public land hunt from the cover photo) or hunt over big food sources, the key is being able to see a fair amount of quality area. If you can see long distances and get eyes on a buck, you can then make a move in for the kill. Observe, plan, and attack.
Step 2: Analyze Conditions That Elicit Daylight Movement
Once you locate a buck, either through trail cameras or observation, the next step is to figure out what makes him move in daylight. If you get eyes on a buck while hunting and have similar weather conditions the next day, make your move right away and don’t wait. Now, if conditions the next day will be much different, say an opposite wind direction for example, then you might not be able to make that killing move. Regardless, take a look at all of the conditions that presented themselves when you saw the buck and analyze what may have had him up on his feet in daylight.
When it comes to trail cameras, if you are lucky enough to have weeks or months’ worth of data, take that information and do whatever you can to figure out if a buck is following any type of pattern. A great tool that I use is DeerLab, which automatically takes weather data and spits it out for you to show weather conditions while bucks are moving. Long story short, too often people get a ton of photos of bucks in the middle of the night and then hunt hoping to see that buck. This time of year, if you want the best odds of shooting a mature buck, you’ll want to capitalize on conditions that elicit daylight movement.
Step 3: Execute a Plan
Once you have located a buck and figured out conditions that encourage daylight movement, it’s time to execute a plan. Often times a buck isn’t bedding very far away from food this time of year. Keep this in mind as you access stand sites because you’ll want to be super stealthy the closer you get to where you’re hunting. Take the learned information and put it to use. Whether you get eyes on a buck or are using trail cameras, wait until the right conditions present themselves, and then move in for the kill.
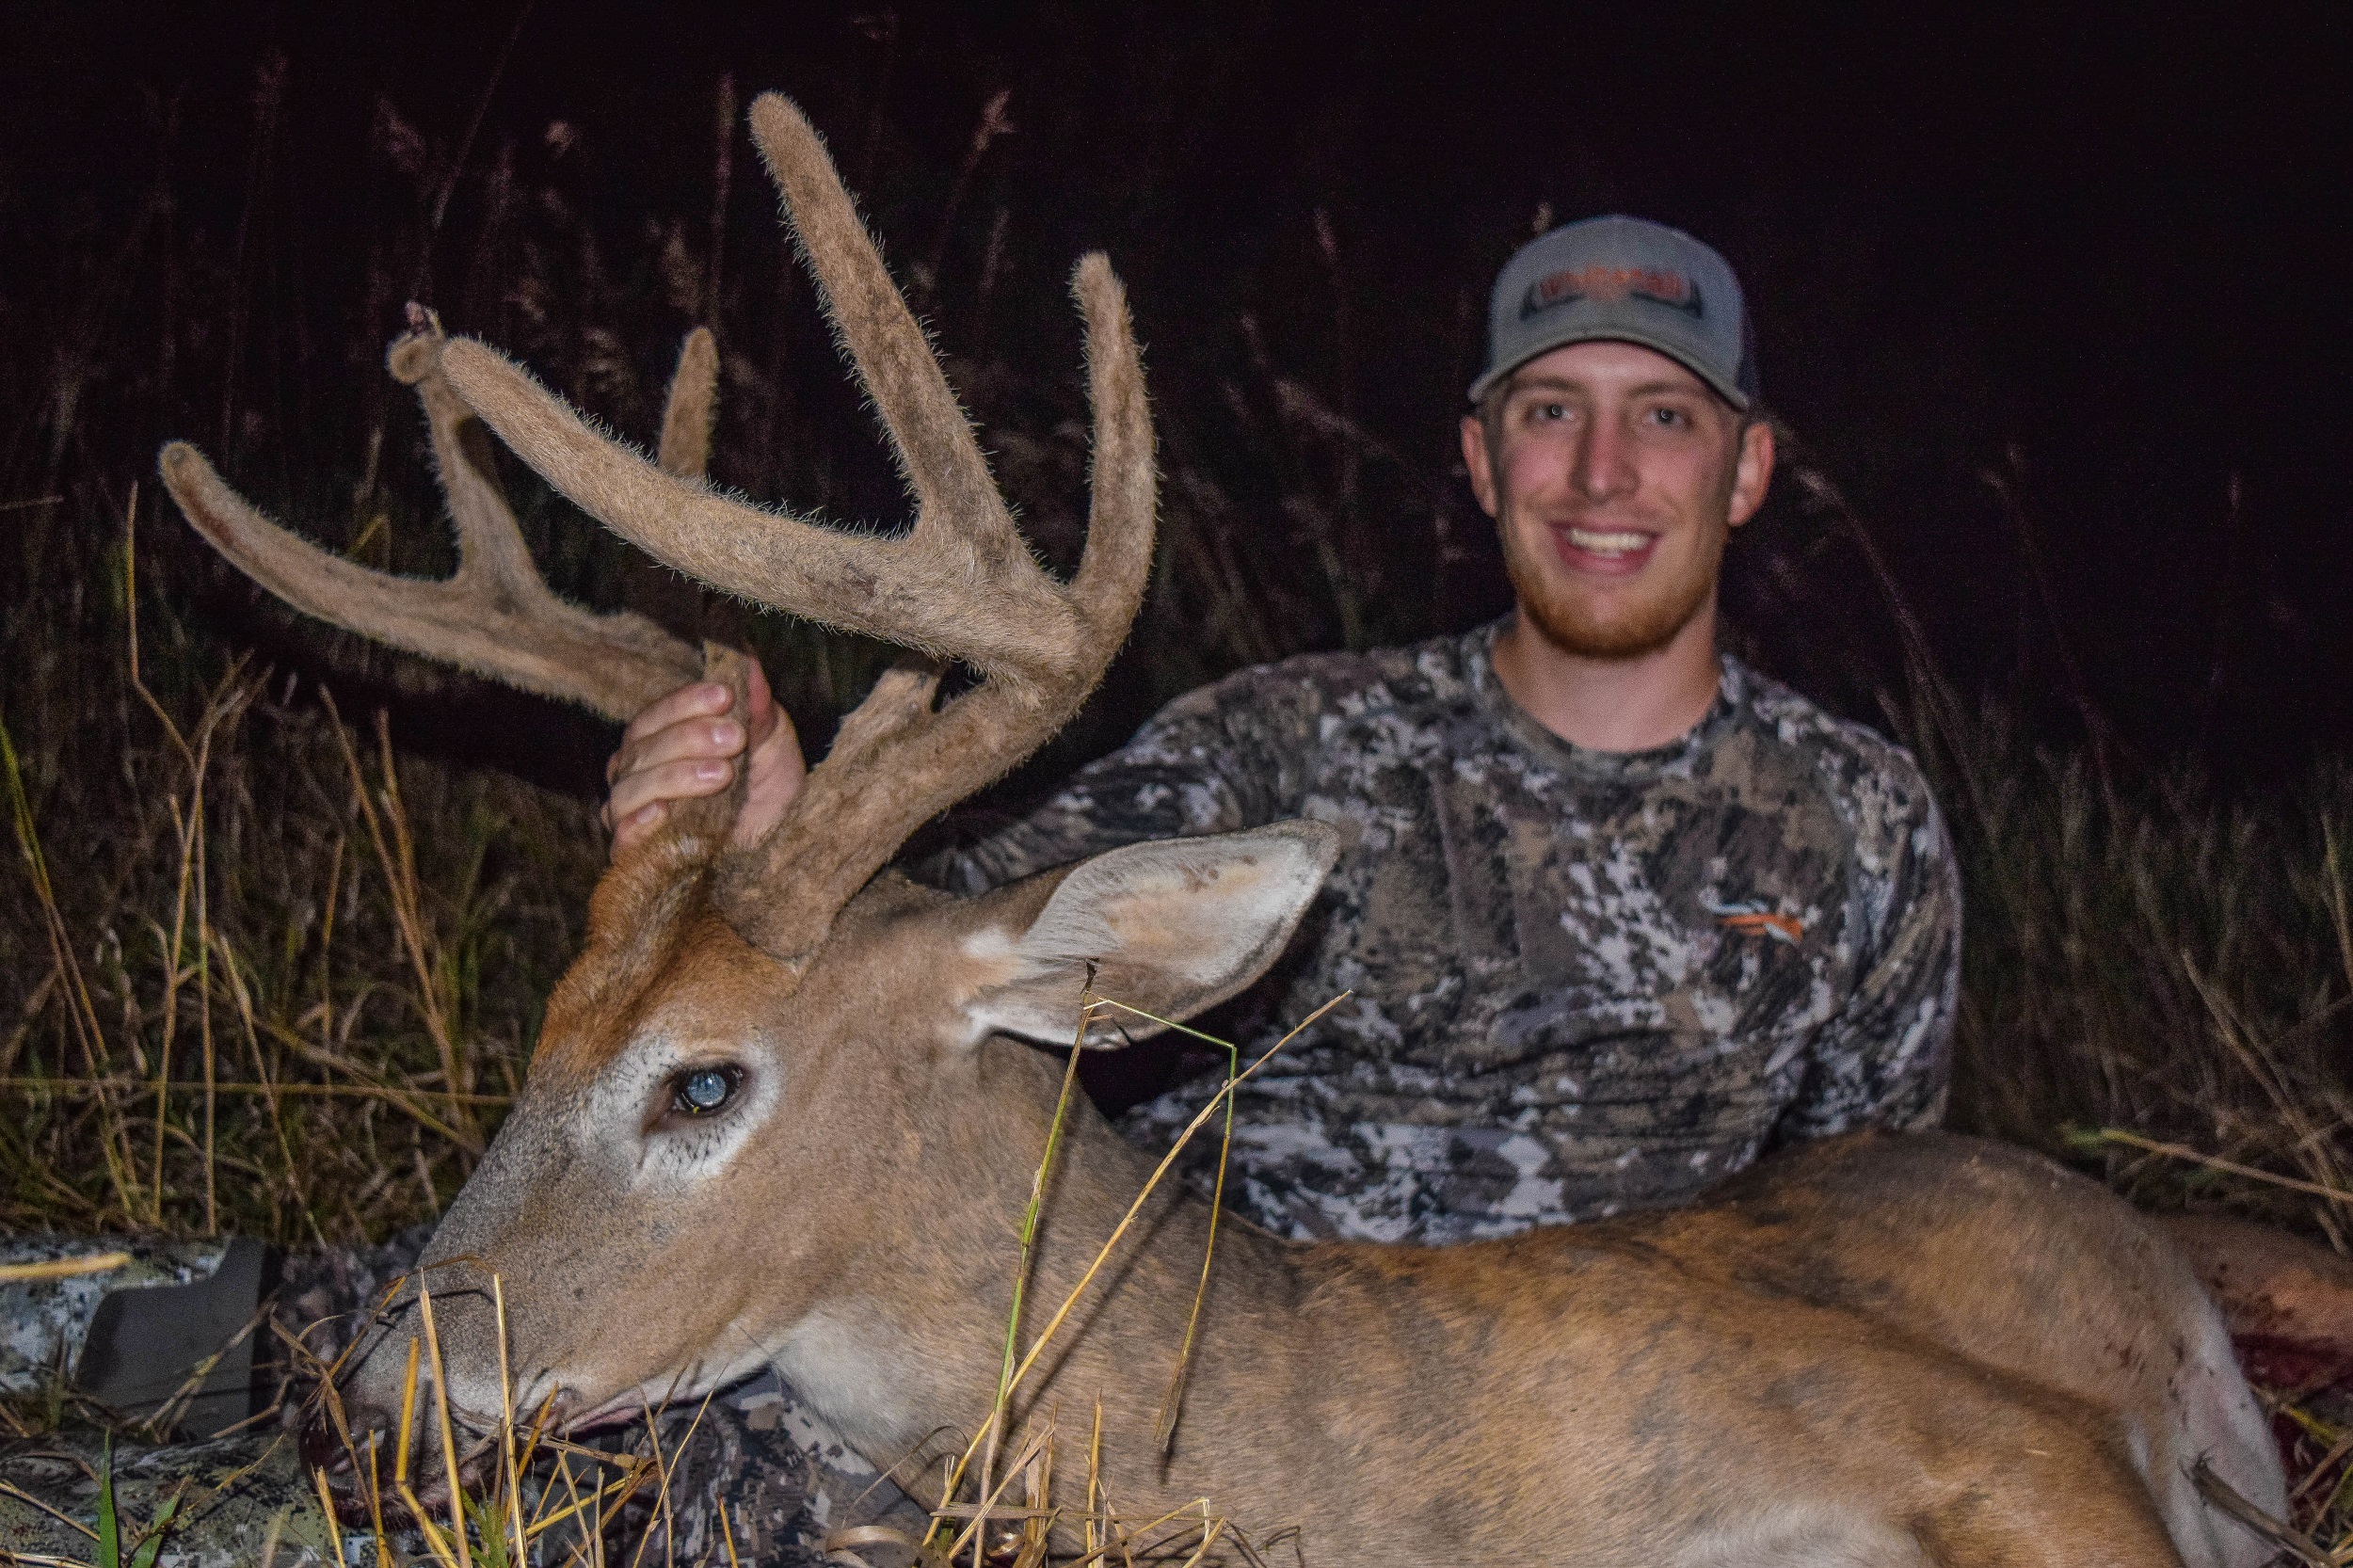 The author with his 2018 velvet buck after his three-step approach came together in North Dakota.
Conclusion
These three steps were put on display the first week of September while I was hunting in North Dakota this year (watch the hunt here). I located a buck through trail cameras, knew he was daylight active, and I went in and was able to harvest him my first time in that stand. Take these three steps, put them to use, and you could be in position to put down an early season buck of your own.
