


Successful food plots, no matter what size, start with proper site preparation. Far too many deer managers get caught up in what seed to select, rather than understanding what exactly needs to be done to the anticipated food plot site prior to planting. It’s easy to do, especially when you’re a first time food plotter. Let’s face it, planting food plots is exciting stuff and it’s easy to get ahead of ourselves, but do yourself (and the deer) a favor and prep it right.
In this part of the small food plot mini-series, we’ll be addressing site preparation and maintenance of food plots. Site preparation and maintenance is largely the same for food plots big and small.
Site Prep for New or First Year Food Plots
 We all wish we had a bulldozer at our disposal for creating new food plots.
Brand new food plots are obviously going to require the most time and work. Small food plots, also known as kill plots, hidey-hole plots, or poor-man’s plots are a lot of times chosen based upon some sort of pre-existing site condition – usually an opening with no trees. These little open pockets of brush and grass are fairly common, and often trigger us whitetail hunters to immediately think “food plot” when we come across one. It can’t be that hard, right? After all, there’s no trees to bulldoze. “With a little help from a hunting buddy, we could turn this unproductive pocket of fescue into a lush green food plot in just a day or two”, we tell ourselves.
Let’s get to work!
Your first step should be to collect a soil sample from your plot and send it to a lab for analyzing. Don’t just think that because the soil looks good it is good. There’s probably a soil related reason why there is no trees growing in that pocket. A simple treatment of 10-10-10 won’t do, so get a soil test done before spending time and money on the plot. You want to do this first so you can get to work on clearing while you wait for the results.
HOW TO CONDUCT A SOIL TEST FOR YOUR FOOD PLOTS
Next, you’ll want to clear the site of any brushy or woody stems. If it’s grass, you can either mow it down or burn it off depending upon equipment availability and accessibility. The timing of this process will also play a crucial role in taking the right steps. If the vegetation is growing and green, you’ll want to treat with glyphosate (active ingredient in Roundup) to get a good kill of the weeds and their root systems before you expose the ground. The bullets below details the steps depending upon the season or time of clearing:
- Before spring green up > 1. burn off residual or mow and wait for green up to occur > treat with glyphosate once vegetation is roughly 4”-6” in height > work up or broadcast clover 1-2 weeks after die-off if burned
- After spring green up through summer > mow to reduce veg. height > wait for new growth to reach 6” and spray with glyphosate > work up or burn off thatch layer prior to planting
- Early fall > treat with glyphosate to get a good kill going into winter > work up and plant next spring
Timing is everything with proper site preparation of food plots. As a rule of thumb, figure it will take roughly a month to obtain a weed controlled site because you’ll have to wait 1-2 weeks for the glyphosate to kill everything.
 Here is a first year food plot planted with Roundup Ready soybeans to control the weeds. This year it will be planted with Eagle Seed Broadside which is a brassica/winter wheat mix.
One trick I’ve learned over the years on first year food plots is to plant them with Roundup Ready soybeans or other Roundup Ready seed. If seed is Roundup Ready (RR), it simply implies that it will be unaffected by Roundup or glyphosate if sprayed with the appropriate ratio. This means you can spray the area after the food plot has begun to grow and knock the weeds back. By using this technique during the first year or two, you’ll really put a hurting on the future weed problem, which is critical. However, depending on the size of the plot and deer population, just know that the plots may get wiped out before deer season starts (especially soybeans).
Breaking Ground

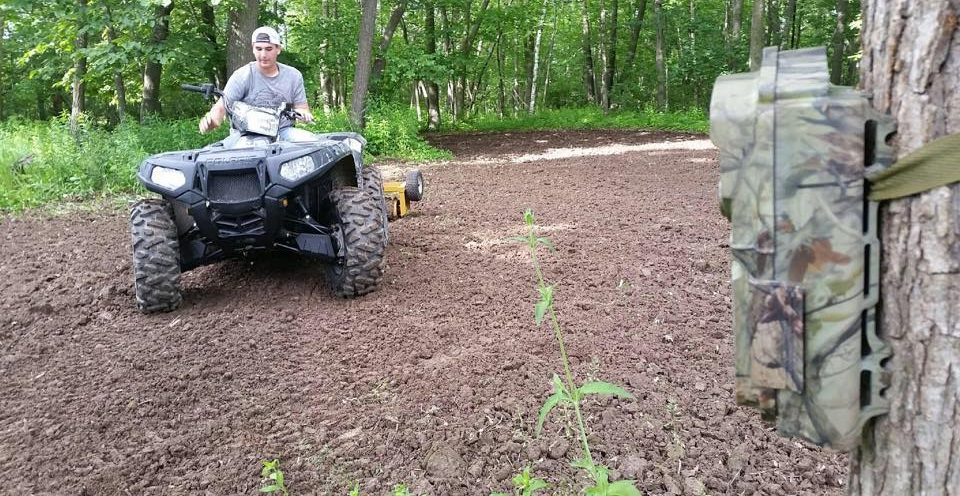
Once the weeds are knocked back, it’s time to work or expose the soil to get ready for planting. How you do this largely depends on what type of equipment you have available and if you can physically get it to the location of the food plot. For this section, we’ll concentrate on small equipment and garden tools since that’s what most of us are limited to on these small scale food plots. Without a doubt, breaking ground on a new plot is the toughest part of the equation and will likely require the most time and hard labor.
First off, the type of seed you want to plant (click here for suggestions) will play a role in how vigorously the land needs to be worked. Small, hardy seeds, like clovers and brassicas, can do quite well with as little as a bit of ground scraping with a steel rake. Of course, the better a seed bed is worked, the better seed-to-soil contact you will achieve. Again, the biggest thing is making sure the weeds are killed and plant just before a decent rain.
In the past, I’ve used everything from a garden rototiller to a full blown 100hp tractor with a 15’ disc to break ground on food plots. While we would all prefer the latter, there have also been plenty of hunters who’ve simply broadcasted seed onto barren ground following a burn and had terrific results…no tillage needed! Figure out what you have access to and how you are going to do it. A little bit of sweat will be good for you. It doesn’t need to look as pretty as a freshly cultivated ag field to get great results. Just make sure the majority of seeds will come in contact with soil and the competing vegetation is dead or gone.
Liming and Fertilizing Food Plots
 Spreading fertilizer in a food plot with a shoulder spin seeder.
Liming and fertilizing goes hand in hand with soil sampling, and like soil sampling, it is a step often skipped by first time food plotters. Liming should be done based upon soil analysis and should be spread before planting.
Fertilizing, in most cases, should wait until plants begin to grow. If you fertilize before seeding, the nutrients will have largely leached away before the roots ever had a chance to suck them up. Thus, you’ll only be wasting money and helping the weeds. Fertilizing should also be done based upon crop type and soil analysis recommendations.
Seeding Your Food Plot
 I use an ATV 12-Volt powered spin seeder to broadcast soybeans in all my food plots.
Finally, the fun part! …or at least the part where you’re finally starting to see the light at the end of the tunnel. There’s really not much to this other than making sure you put the right amount of seed down. Believe me, there is such a thing as “too much seed”, and it’s often quite tempting when seeding brassicas because it seems like there’s barely enough seed to plant 1 square foot much less the ½ acre the bag tells you it will plant. I’ve been there and I’ve over seeded more than I care to admit. DON’T DO IT! Unless you’re looking for a carpet of green brassicas that reach a max height of 2 inches and never grow bulbs, follow the recommended seeding rates on the bag. If broadcasting (rather than drilling) seed at a rate 1.5 times the recommendation, as germination rates will be lower.
Don’t know what to plant? Click Here!
Any type of spin seeder will work fine for seeding the small area. Typically, a small hand crank seeder works the best. When figuring out how far to open the seeder holes, start small. I always prefer to cover my plots 2 or 3 times over rather than running out to soon. Once the seed is down, give it a quick rake or drag it to promote better germination.
Wait until just before a rain to seed your food plots. This is really important when broadcast seeding food plots.
Maintenance
After you’ve planted, there’s not much to do other than wait and watch it grow. As stated earlier, give it a top dressing of fertilizer per recommendation once the plants have established roots or are about 4 inches tall. Aside from fertilizing, maintaining weeds is the main goal. Use selective herbicides to treat the plot if weeds become a problem. Use broadleaf and grass specific herbicides to help you manage specific weed types. If you use a Roundup Ready product like I mentioned before, spray the entire plot with glyphosate when needed.
Well, that was quite the journey my friends, do it right and it will be worth it!
Next Up: Tools for a Low Budget Food Plot

